Monday, August 3, 2026
Your Bluetooth is bad, August 2026 (Battery and Name)
Wednesday, July 8, 2026
API Rules for designers: use one encoding, not two
"If you haven't tested your code, it's probably wrong"
Today's bad API example is from the Bluetooth Heart Rate system. Most of the protocol is fine: you get a notification every so often with updated heart rate information (e.g., heart rate in beats per minutes (BPM) plus optional stuff for overall energy and the "RR Interval" for fine-grained heart data).
Testing this protocol is extra expensive because the heart rate (BPM) can be sent in two ways. It might be a single byte, and it might be two bytes. There's a single bit in a flags structure to say which way it is. If the person's heart is 255 BPM or less, it's one byte. If it's 256 or more, it's two bytes. The app code (and device code) has to handle this.
For an app, the code is hard to test for two reasons. Most importantly, a human doesn't ever have a heart rate that high (according to Copilot, "255+ BPM is possible, but it’s always pathological"). The second is that even if I could find a person with a heart rate that high, I have no confidence that any specific consumer-grade device will ever produce this data. As just a person coding in their spare time, I can buy a couple of heart monitors. But imagine I still worked at Microsoft: what are the changes that a VP (that's the clearance it takes for approving purchases) would sign off on an unknown number of devices on the chance that one of them would produce this data?
In the end, I've got code in my new Bluetooth app (not on the Microsoft app store yet) to handle the special flag. But my confidence that it works isn't great.
The right API choice was to always send 2 bytes of data and not try to make something in the name of spurious efficiency.
For the nay-sayers: the awkward protocol doesn't support any interesting new scenarios, and doesn't have any appreciable amount of energy.
If they had kept the protocol as-is, developers would have the same abilities. The RR Interval data size would shrink from 9 entries to 8 -- but in typical use, there's only 3 or 4 entries. And if there's a case for needing more than 8 entries, the Bluetooth device could simply transmit more often.
Takeaway: Protocol designers should always include "how will a developer test their code" when considering complicated APIs.
Sunday, June 8, 2025
A quick guide to using Bluetooth serial ports from C#
Reading from classic Bluetooth serial ports isn't hard but does involve understanding 5 different classes and connecting them together. In this post, I'm show all the classes you need to make the code work, how to create or use them, and how they fit together. This walk-through will be in reverse order: I'll start with actually reading data and then work backwards through the classes. The recapitulation at the end will list the objects in forward order.
I use this code to connect to a small portable GPS device that sends National Maritime Electronics Industry (NMEA) formatted GPS information over a Bluetooth serial port device and translate and display the resulting messages in an easy-to-use app.
Starting with the DataReader class you need to read from your device, and ending up with the generic Device interfaces, here's the classes and objects you need to use your Bluetooth serial-port connected device.
Use a DataReader to read the data.
Documentation DataReader:
Hints for using DataReader: call LoadAsync(count) to read from the serial port into the DataReader's internal memory and then ReadString() to get a string of the data. Be sure to set the InputStreamOptions to Partial. Partial means that whenever there's data the load will return. This is important because the serial port sends just a little data at a time.
Constructing the DataReader: construct the DataReader with the constructor that takes an IInputStream as a parameter
The IInputStream is from a connected StreamSocket.
Documentation IInputStream:
An IInputStream is an interface for the concept of "getting stream of data (with no framing) from a specific source like a Bluetooth device or a network connection. You won't be calling any methods on it.
Getting the IInputStream: your IInputStream will be from a connected StreamSocket's InputStream property.
The StreamSocket is connected using data from an RfcommDeviceService objects
Documentation StreamSocket:
Hints for the StreamSocket: StreamSocket is a single class that can handle multiple different type of connections. Common uses are for networking (where it's a classic TCP/IP network connection) and for Bluetooth classic. You'll just connect it and then use its InputStream property.
Constructing the StreamSocket: construct the StreamSocket with the default constructor with no parameters and then connect it using the RfcommDeviceService's ConnectionHostName and ConnectionServiceName. The hostname will look like "(00:19:01:48:4E:F5)" and the servicename will look like "Bluetooth#Bluetooth2c:0d:a7:c8:53:33-00:19:01:48:4e:f5#RFCOMM:00000000:{00001101-0000-1000-8000-00805f9b34fb}"
The RfcommDeviceService is from a BluetoothDevice object
Documentation RfcommDeviceService:
Hints for the RfcommDeviceService: The RfcommDeviceService is a little confusing because there's so much apparent overlap between a BluetoothDevice which supports an RfcommDeviceService. A good way to think of it is that my GPS Bluetooth serial device is the "BluetoothDevice" as seen by Windows. And the RfcommDeviceService is the serial port that could theoretically be connected to anything.
Getting the RfcommDeviceService: The RfcommDeviceService is gotten from the BluetoothDevice. There are two ways to do this:
- Call the GetRfcommServicesForIdAsync() method to get just the specific serial service you want. This lets you ask for a serial port and not, for example, an ObexFileTransfer. I know ahead of time that I want the SerialPort service, so I use this method to get just the right matching services (although I think there will always be just the one)
- Call the GetRfcommServicesAsync() method get a list of all possible serial services and then pick your preferred service from it.
It's important to know that Device might support both the generic raw serial port as RfcommServiceId.SerialPort and might also support the more structured ObexFileTransfer. For my specific GPS device, it supports both the SerialPort and also the MFi/iAP(2) protocol. When I connect to the device, I see the NMEA messages, so it must be the right one.
BluetoothDevice object is initialized from a DeviceInformation Id
Documentation DeviceInformation:
The BluetoothDevice object that's used to get the RfcommDeviceService is used in the program to track device events like the connection being lost, and to ask for permission to access the device.
Constructing the BluetoothDevice: call the static BluetoothDevice.FromIdAync(deviceId) method, passing in the select DeviceInformation's Id property.
The DeviceInformation object is found with DeviceInformation.FindAllAsync(query)
The DeviceInformation object is used by the Windows device system to return information about devices in a Windows computer. A device can be an adapter, like a USB port or Bluetooth port, or a device like a video card or monitor, or an input device like a keyboard or mouse.
Getting a DeviceInformation object. Devices are found using a query string in the Advanced Query Syntax (AQS) format. This format has no obvious documentation at learn.microsoft.com. The good news is that you can get pre-created strings for devices, so it's no great loss. Get a pre-created string from the static GetDeviceSelector() method on each device class. The methods often do not require any parameters; sometime they take in some kind of specialty parameter. For my program, I eventually need a BluetoothDevice, and I know it must be paired, so I use an AQS query string from BluetoothDevice.
Use the AQS string in the DeviceInformation.FindAllAsync() method. This returns a list of DeviceInformation objects. You'll have to look at each DeviceInformation object to decide which one to use. I often do a match using the Name property.
Hints for using the DeviceInformation: Most of code for reading and writing a Bluetooth serial port is very similar and can often be shared between your different Bluetooth projects. But matching a device is often unique to the device and will have to be changed for every program. It's best to not try to wrap the matching code into something "handier" or "easier to understand".
Recap: critical steps
Let's recapitulate the steps, but this time in the order you'll do it in your code. In these steps, names in UpperCase are classes and lowerCase are objects.
The steps to reading from a Bluetooth serial device are:
- Get a DeviceInformation object by using an AQS string from a static device GetDeviceSelector() method and passing that AQS string to the static DeviceInformation.FindAllAsync() method
- Create a BluetoothDevice from the deviceInformation.Id property with the static BluetoothDevice.FromIdAsync() method
- Find the correct RfcommDeviceService from the bluetoothDevice.GetRfcommServicesForIdAsync() method.
- Construct a StreamSocket and then connect it with the rfcommDeviceService's ConnectedHostName and ConnectedHostService
- Get an IInputStream from the streamSocket.InputStream property
- Create a DataReader object with the DataReader constructor that takes an IInputStream as a parameter. Set the dataReader option to Partial
- Call dataReader.LoadAsync() to get some of the serial data from the device, and call dataReader.ReadString() to get the data as a string.
Thanks for reading, and good luck!
Tuesday, January 28, 2025
Modbus: deciphering the CRC protocol
The Modbus over Serial protocol doc has a clear, simple set of instructions on how to decode. You just have to know that two of the steps are in a reverse order, but it actually makes sense.
The Modbus protocol is used by the Daybetter LED light Bluetooth protocol. It's arguably a terrible fit for this: the protocol includes a bunch of stuff that isn't even slightly relevant with Bluetooth (like the CRC), but doesn't leverage any of the Bluetooth strengths (like the ability to split "color" from "on/off")
Modbus CRC Calculations explained
Here's the official explanation of the CRC calculations from page 14+15 of , modified into a numbered list. Absolutely no changes were made except to make it a list -- that's why there's still weird commas and periods. It's substantially the same as the steps in page 39 to 41 in section 6.2.2 AKA Appendix B.
During generation of the CRC,
- each 8–bit character is exclusive ORed with the register contents.
- Then the result is shifted in the direction of the least significant bit (LSB), with a zero filled into the most significant bit (MSB) position.
- The LSB is extracted and examined.
- If the LSB was a 1, the register is then exclusive ORed with a preset, fixed value. If the LSB was a 0, no exclusive OR takes place.
Note that clear ordering: first you do a shift, then you look at the LSB and do the XOR. BTW, the "preset, fixed value" is 0xA001 (decimal 40961 or binary 1010 0000 0000 0001)
But when you look at the commonly-available Modbus CRC calculations from random Github repositories, the code always switches steps 2 and 3! The LSB is grabbed first! What the heck! why are the clear and unambiguous steps in the official docs not what everyone implements?
Everyone is right because of Microcontrollers!
When you look at high-level languages, a right-shift is just a right shift, possibly with the ability to decide what gets shifted into the MSB (either duplicating the old bit, so a negative number stays negative, or filling it with zeros). But that's not what microcontrollers programmed in assembly do!
A typical microcontroller will do the shift (often with lots more control over the bits) and will also set the carry flag. The next instruction you do can then be a conditional jump based on the carry bit and therefore based on the original LSB.
And indeed, the flowchart diagram from the Modbus protocol doc, appendix B, page 40, labels the item 4 "if" statement as "Carry over" yes/no. They are expecting implementors to use the carry flag or the overflow flag depending on the microcontroller being programmed!
The Modbus flowchart is reproduced below.
Microcontroller assembly
Helpful Links:
Modbus over Serial Line specification and implementation guide
Sunday, September 24, 2023
Project: Govee E-Ink display
The Govee H5074 E-Ink display project!
All complete! This project uses an Adafruit nrf52840 board running CircuitPython and their 2.13 inch e-ink display (the tri-color one) to pull in data via Bluetooth LE from a Govee H5074 temperate and humidity sensor.
Watch it on YouTube. Also, the code is up on Github; take a look!
Some of the challenging / fun parts: on reset, the device will look around for a Bluetooth "Current Time Service" so that the clock is set automatically (no need to every manually set it!). Reading in Bluetooth advertisements for the Govee H5074 was not as obvious as it should have been (and I've got a blog post about it), and the e-ink display was much more challenging than I though it would be.
Reading Bluetooth LE (BLE) sensor data advertisements in CircuitPython
Bluetooth Sensors -- reading the Govee H5074 advertisement data
Friday, June 30, 2023
Clocks that set themselves!
The Adafruit Clue-Clock
I'm always frustrated when I have to reset a bunch of clocks after a power outage. Did you know that setting the time on an IOT device can be easy when you add support for the Bluetooth Current Time Service? (On the SIG site you will want the first doc, "Current Time Service 1.1"). In this blog post I show some of the code I wrote for the Adafruit Clue using CircuitPython and the adafruit_ble library. I've even got a Youtube video! to show the device and step through the code.
There's also a handy Windows app that is the server side of the time setting; it will broadcast out the current time. Download "Simple Bluetooth Time Service" on the Windows store; that's how I set the time. The complete source code for it is on Github. Update: see also my [Govee Ink Display](ElectronicsProjects/2023-Adafruit-Python-InkGoveeListener at main · pedasmith/ElectronicsProjects (github.com) project; it has a newer and easier-to-use version of the clock code.
In the video I step through three interesting features of the clock.
Feature 1: Display stuff to the screen
We'll want to print text to the screen; this is done with the clue.simple_text_display() object. The clock uses the simple_text_display, so we can display several lines of text, but nothing fancier.
A key point (that took me far to long to figure out!) is that after you update one or more a lines of text, you must call the .show() method -- otherwise, nothing gets displayed!
Sample Code
from adafruit_clue import clue
colors = ((0xff, 0xff, 0xff),)display = clue.simple_text_display(title="Clock",title_scale=2, text_scale=4,title_color=(0xa0, 0xa0, 0xa0),colors=colors)str = "{:02d}:{:02d}:{:02d}".format(currHour, currMinute, currSecond)clue_display[0].text = strclue_display.show()
The simple_text_display is documented on the circuitpython site.
The text_scale value of 4 fits a time display with a format of HH:MM:SS (8 characters long) with room for two more characters (eg, enough room for an AM/PM indicator, if desired)
The title_scale is relative to the text_scale.
The colors set the colors of each line. I set it so tht the time and date are white, and the day (and the bluetooth scan results) are blue.
Feature 2: Use the Real Time Clock
The chip used to track time accurately is the "real time clock" -- without it, the code would slowly drift. Fun fact: the first IBM PC did not include a battery-backed real-time clock chip. Every time you turned on the computer, you had to enter the date and time.
The real-time clock uses struct_time for many operations; it's just a tuple where you can grab values by index. the current hour, for example, is index 3.
The real-time clock needs power to work; if it loses power, it will stop stracking an accurate date and time (it says "real time clock", but it does dates, too). How we set it is the topic of the next section.
The CircuitPython rtc module is a delight to use: there's just a simple way to set the initial value and a simple way to pull out the current time.
Feature 3: Connect to Bluetooth Current Time Service
Now we get the hard stuff: reading data from an external Bluetooth "Current Time Service" source. The idea is that a nearby PC will broadcast out a "current time" (there's a standard for this); the clock will pick it up and use it to set its time.
To make it work, you should have already added the adafruit_ble to your lib directory. It's not on the list of libraries in the Adafruit Clue documentation.
The bulk of the Bluetooth code is in BtCurrentTimeServiceClient.py. There's two critical classes in that file: the BtCurrentTimeServiceClient class which matches the Bluetooth Special Interest Group (SIG) standard and which is compatible with the Adafruit CircuitPython Bluetooth setup, plus a helpful wrapper class BtCurrentTimeServiceClientRunner class which listens for Bluetooth advertisements and connects to the time service.
You will want to look at the code while reading this description :-)
BtCurrentTimeServiceClient
The BtCurrentTimeServiceClient class is less than 20 lines of code. The Adafruit CircuitPython Bluetooth system isn't too hard to use, but there isn't a very good tutorial on it. Hopefully this explanation will help!
The BtCurrentTimeServiceClient class exists for only one reason: it's the "glue" between the Bluetooth system and your code. When you get an advertisement for a Bluetooth device you want to connect to, you'll provide this class (the class and not an object) and will get back an object that's mostly this class (it will have been updated)
The object you get back will only be valid until the connection is broken. In the code, the connection is broken almost as soon as the data is read.
class BtCurrentTimeServiceClient(Service):
uuid = StandardUUID(0x1805)
data = StructCharacteristic(
uuid=StandardUUID(0x2A2B),
# Don't need to provide these; they should be discovered
# by the Bluetooth system.
# properties=Characteristic.READ | Characteristic.NOTIFY,
struct_format="<HBBBBBBBB"
)
def GetTimeString(self):
(y, m, d, hh, mm, ss, j1, j2, j3) = self.data
retval = "{0}-{1}-{2} {3}:{4}:{5}".format(y, m, d, hh, mm, ss)
return retval
The data value is set to be a StructCharacteristic. But when you examine the data later on (like after it's been updated by the remote side!), it will instead be a tuple of the data, parsed by the struct_format string. You just have to know from other sources what the data values actually mean.
BtCurrentTimeServiceClientRunner
The BtCurrentTimeServiceClientRunner is the class you'll actually call to get the Bluetooth current time data. Just call Scan, passing in a bluetooth "ble object; it's the Bluetooth from the clue device (```ble = adafruit_ble.BLERadio()```). There aren't any other methods in the class that should be called.
The runner Scan method will scan for Bluetooth advertisements for a set amount of time (15 seconds in this case); the scans can complete in less time, so I loop around as needed. The inner loop of Scan calls ScanOnce to do a single advertisement scan, returning a connected Bluetooth device. Once this method has a connected Bluetooth device, we hook up the service connection with the ConnectToCurrentTimeService method (yeah, I'm using the word "connected" here in kind of two different ways). Once we have a service connection, we can pull out the time data directly.
The ScanOnce returns a connected connection to the remote device (or None, of course). It does a single advertisement scan, up to a maximum amount of time, looking for an advertisement that says it supports the current time service. When one of those is found, we connect to that device. In my case, the device will just be my laptop when it's running the Simple Bluetooth Current Time Service app.
The ConnectToCurrentTimeService creates a 'live' (connected) service object given a connection to a device.
To convert a connection to a bluetooth device into a useable per-service object, you need to provide a class with a uuid that matches the service you need to use, plus a data object which needs to be one of the Characteristic types (for example, StructCharacteristic). When you "get" an object from the connection, the smart connection "array" will create a brand-new object for you, of the class you specify, that's hooked to (connected to) the live Bluetooth object. As part of this, the "data" value in the class, which had been, e.g., a StructCharacteristic, will now just be a tuple of data. Reading that tuple will get you the latest data.
To recap: the Scan method will scan advertisements for an appropriate BT device, will connect to it, will make a service connection, read the characteristic data, put that data into a tuple, and return the tuple. In case of errors, it will just return None.
Once the tuple of date is read, we just set up the real-time clock at about line 74 of the code.py file. Once this happens, the clock will be updated!
You can make this work for your device, too -- just pop in the BtCurrentTimeServiceClient.py, and call the Scan() method with a BT radio. Just don't forget to include the adafruit_ble library on your device!
Good luck!
Friday, April 14, 2023
Hints on using CircuitPython's adafruit_ble Bluetooth
Some APIs and libraries for Bluetooth are a joy to use: they fit right into our basic concepts of how the protocol work, and match the kinds of tasks we want to do.
And then there's the adafruit_ble library.
I've been working on a little project using the very nifty AdaFruit Feature nRF52840, and there's a lot to like about it. They got a ton of the details just *french kiss*, starting with the font on the main device (the 840 is in extra-large letters so you can quickly tell one from the other) and running to their library of compatible "feather" devices and integration into CircuitPython.
But the ble library? They have clearly spent a ton of time and effort on it (which I thank them for). But everything in it is just that little bit backwards from everything I know about Bluetooth.
Example: why doesn't this code work?
Why this is horrific, and how much time I wasted
- using a different kind of UUID (UUID versus StandardUUID)
- getting the UUID from a different place (afafruit_ble versus bleio)
- testing to make sure that the 'in' wasn't just always returning true by trying a fake UUID
- connecting at different times
- stopping the scan before getting data
- doing a time.sleep(5) before connecting or getting data
- connecting to the address versus the advertisement
- getting the service twice
- pairing
- iterate through the services (this was really weird)
- disconnecting when I was done
- putting it in a try/except block to investigate the exception
Doc shortcomings examples
What should they have done?
Handy Links
Friday, March 31, 2023
WTF is “Exact time 256” : diving into Bluetooth SIG documents
WTF is “Exact time 256”
The Bluetooth Special Interest Group (SIG) has a metric ton of Bluetooth LE device specs in a massively confusing pile. In this walkthrough I’ll show how I figured out the details of a fairly simple LE protocol. In particular, I’ll be creating something that needs to match the “Current Time Service”, services # 0x1805.
TL/DR: the good document is the “Gatt Specification Supplement”.
On the Bluetooth.com
site, you want “Specifications” and under specification you’ll need a tab open
for both the “Assigned numbers” and the “Specifications” directory.
In “Assigned numbers”, there’s two important documents. The
first is “Assigned
Numbers Document”. It’s a giant list of all of the GATT services by name
and all of the characteristics. The second is “Gatt
Specification Supplement”.
In the “Specifications” directory, find the listing for the
"Current Time Service” and click the link
to get the service page. It's got a bunch of the lest useful programming documents ever. The only document that’s interesting for most
developers is the Current Time Service 1.1 PDF file. Click the link
to read the long, complicated document.
Page 9 starts to be interesting: the Current Time Service
supports three characteristics: the “Current Time” (page 10), “Local Time”, and
“reference Time”. On page 10 it’s mentioned that we’ll be reading the Exact
Time 256 field. This is the first bit of useful (and critical) information
in the spec.
BTW, when they say “Unknown”, it’s not clear to me which
“Unknown” value they mean. But in the Assigned Numbers document there are 8 time that
“Unknown” is mentioned; all of the numeric values (6 of them) are zero. The
others are weird strings for something having to do with telegrams. Or not,
it’s a Bluetooth SIG spec, so nothing is clear.
At this point you might wonder what the actual bytes are.
The Bluetooth SIG doesn’t care that you’re wondering. You might even try typing
“Exact Time 256” into the main page search box on the main page, but you won’t get any hits.
However, you can find it in the Assigned numbers where it has number 0x2A0C in
the “Characteristics by name” and “Characteristics by UUID” section.
Note that in the “Specifications” it lists “Current Time” as
the characteristic; that’s characteristic 0x2A2B.
And then finally, take a look at the GATT Specification Supplement,
page 78, section 3.62, “Current Time”. It lists the bytes: there’s an Exact
Time 256 and then a U8 “Adjust Reason” which says why the time changed. Even better, there's a decent overview of the Exact Time 256 fields!
And here the path through the forest of all Bluetooth knowledge ends. If only there was some way to know that the "supplement" is in fact the useful document, and not the pile of other docs.
Monday, January 2, 2023
Your Bluetooth is bad, January 2023 edition
Your Bluetooth protocol is bad, January 2023
I've finally gotten over a big hump in my Bluetooth Device Controller program -- I've been poking around with adding and fiddling with devices, and that means that the code has been getting much more "experimental". That's not a good thing for an app that I ship, and which has over 35 thousand downloads! I've been working hard to convert the experimental code into an app that people can use without too much frustration.
With that, it's on to the next installment of this series on crappy Bluetooth protocols, focused on the Govee line of air sensors. The version 1.10 app supports the Govee 5074; the next version (presumably 1.11) will support the 5075 and 5106. All of them suffer from the same three flaws, and the 5106 has a unique and fun new flaw.
Don't shut off communications too early. All of the Govee devices like to shut down their Bluetooth connections really fast -- after about 4 seconds, they shut down the connection even if you've been talking on it. Other devices will wait until the connection has no traffic before shutting down.
Just transmit your freaking data. If you provide data, just provide it: make a characteristic, and make it readable and notifiable.
Don't fold multiple values into decimal values. This is harder to explain. The Govee Air Sensor, as an example, sends out temperature, humidity, and air quality data in a single advertisement. But instead of just filling in 3 two-byte integer values, they instead take the temperature and multiple by 1_000_000. Then then take the humidity and multiple by 1_000. Then they add the air quality. This is all written as a single 4-byte integer.
To decode this monstrosity, you have to read in the 4-byte unsigned integer (in big-endian mode, even though Bluetooth is mostly little-endian). Then do a weird combination of MOD and integer divide operations to split out the three numbers.
Use the right Manufacturer code. The Govee devices mostly use a made-up EC88 manufacturer code; this is an unassigned value that nobody should be using. But the 5106 Air Quality monitor, for no apparent reason, uses the Nokia Phone code (they are manufacturer #1).
FYI: Common Timeout connection parameters
- 100 ms used by the SensorBug
- 175 ms used by the Sphero
- 4 sec used by the microbit, the govee, the kano coding wand, the viatom, the vion, and skoobot, smartibot and espruino
- 5 sec used by the gems activity tracker
- 6 sec used by the Mipow and the sense peanut
- 10 sec used by the inkbird, lionel, the pyle, the powerup, the various sensor tags, and the dotti
Monday, May 31, 2021
Filtering out distant Bluetooth signals
TL/DR: nearby Bluetooth devices have a RawSignalStrengthInDbm in the 50s and 60s.
I love playing with Bluetooth devices and writing little apps to control them (including the very special Gopher of Things). One of the hassles with developing, though, is that we're in a sea of Bluetooth devices. Any "watcher" code you write will be inundated with events from everyone else's device (notably their Apple devices which helpfully send lots of Bluetooth advertisements)
So how to filter them out? Step 1 is to look at the RawSignalStrengthInDbm in your Bluetooth watcher's BluetoothLEAdvertisementReceivedEventArgs argument. I did a little experiment: all of the devices I was interested in coding for had a signal strength in the 50's and 60's. Everything in the 80's and higher was noise from the rest of the house.
Note, though, that the strength is in decibels. A strong signal is -50 and a weak signal is 89. To quickly return when the signal strength is too low, do this:
return;
}
In my test, this filters out most of the undesired signals.
Sunday, May 24, 2020
Your bluetooth is bad (continued)
More example of how to make bad Bluetooth devices
What format is my number?
Bluetooth developers continue to create a bewildering variety of undocumented data formats. Indeed, it's a race between them and the bizarrely incompetent "Distributed Ledger" teams for the worse numerical formats.- Nordic Thingy -- you can't just describe a value as a "uint_16"! Specifically, you can't do it because I don't know if you mean a big-endian or little-endian value (as it turns out, the Nordic Thingy is little-endian)
- Also Nordic Thingy -- describing a temperature as a signed value and an unsigned fraction only works if you tell me the denominator of the fraction. Some devices might reasonably make the "fraction" part be out-of-10 to get a degrees in a tenth of a degree (which is just fine for a weather station), or it might be out-of-100 or even out-of-256.
Your Bluetooth is Bad, continued
Very silly Bluetooth protocols, continued
Thursday, January 17, 2019
First lessons learned: Magnetometers!
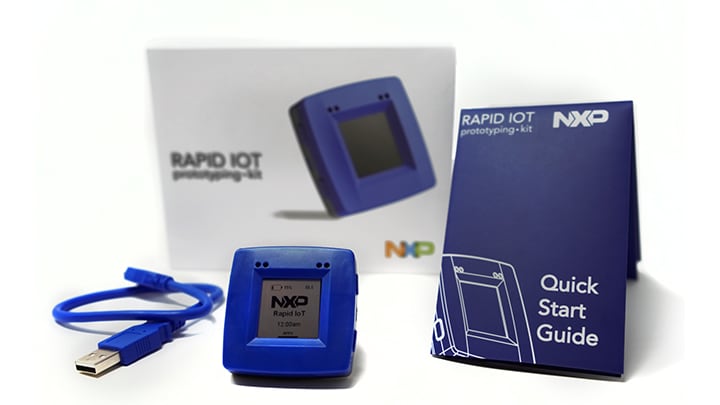
I'm having fun with an NXP Rapid IOT kit as part of a Hackster.io contest. This is the first time I've really tried to deal with a magnetometer and how to convert the seemingly random output into something that can be used for a compass. Here's what I've learned!
You have to calibrate your code to match the magnetometer values. I simply looked at the range of X and Y values as I rotated the IOT kit (range in this case meaning to grab the highest and lowest values). This gives you a midpoint for the X and Y values.
Calculate an adjusted X and Y: Xadjust = (Xmidpoint - Xraw) where the values have the obvious meaning. I suppose a better adjustment would also divide by the overall range so that the X and Y values are also normalized, but so far I haven't needed to do that.
Calculate an angle with the always handy atan2(x, y) function. You might remember from trigonometry class that the tangent of an angle is equal to the opposite side of the triangle divided by the adjacent side. If you know opposite/adjacent, then you automatically know the tangent of the angle, and by using the arc-tangent, can get the original angle back. In computers, we use atan2 and provide the X and Y (aka, adjacent and opposite) values directly; otherwise, there would be a divide-by-zero problem when the adjacent is zero (aka, when pointing magnetic north/south)
In computers we always get the angle in radians; multiply by 180/3.1416 to get the angle in degrees. No, that value for PI is a little off, but take a look at the results you get; they jitter by several degree no matter what.
But then there was a big discovery: my laptop has magnets that really, really interfere with the readings! This isn't helped by the short USB cable provided!
TL/DR: compass heading is atan2 (xadjust, yadjust) where the adjusted values are relative to the actual midpoint that you measure. You have to do the measure locally; it's not a globally-valid amount all over the world. The phrase "all over the world" includes "especially near a modern laptop with magnets"
Fun historical fact: iron ships included "deviascopes" to adjust the magnetic compass and to offset the residual magnetism left over from building the ship. A ship's magnetic field will potentially change every time the ship goes in for servicing (and on battleships, every time the big guns are moved!)
Sunday, July 23, 2017
Infineon Sensor Hub–figuring it out
The device on the right is the sensor hub nano
The problem, of course, is that Infineon is a hardware company. Need to know some hardware related detail? They have reams of charts and graphs. But the Bluetooth spec for the device so we can actually poke at it and get data outside of their Android app? That’s a much harder task.
Well, here’s a little dump of what I’ve learned. The device acts like a serial port (and therefore commits one of the sins from my ‘your Bluetooth is bad’ post).
Commands going in start with a $ and end with just a newline. Data coming back is either JSON format (for the meta-data you can get) or not. But either way, the return data also starts with a $. Except when it starts with a >, like it echoes (some) bad commands.
Initial Messages:
Send these three strings
$hello
$info
To the $hello message the device replies with
${"pt":"urn:{557C199C-D246-43D5-8079-A68986BBAEB1}","uuid":"","username":""}
To the $info message the device replies with
${"name":"IFX_NanoHub","manufacturer":"Infineon","protocol":"1.1","fw":"BSL111_FW312-b16ca0f","baud":115200,"sensors":["1"]}
Yes, it seems to send the same data out twice. And note the silliness with the baud rate – as you all should know, you don’t ever set the internal Bluetooth baud rate.
The you get get more info about the sensors with
$sinfo id=1
The device responds with
${"id":"1",
"manufacturer":"Infineon",
"type":"DPS310",
"chip_id":0,
"port":0,
"dds":[
{
"name":"Pressure",
"id":"p",
"type":"d",
"unit":"mBar"
},
{
"name":"Altitude",
"id":"a",
"type":"d",
"unit":"m"
},
{
"name":"Temperature",
"id":"t",
"type":"d",
"unit":"degC"
}
]
}
${"id":"1","manufacturer":"Infineon","type":"DPS310","chip_id":0,"port":0,"dds":[{"name":"Pressure", "id":"p", "type":"d","unit":"mBar"},{"name":"Altitude", "id":"a", "type":"d","unit":"m"},{"name":"Temperature", "id":"t", "type":"d","unit":"degC"}]}
BTW, I took the results and split them onto multiple lines. Yes, you once again get the duplicated answer. But see how we can tell what data we’re going to get, and how we can tell what kinds of sensors are available. In theory, Infineon engineers can use the “same” protocol for multiple boards.
Then you can set the sensor modes. It seems like you can get by with just sending the $start_sensor command
$set_mode sid=1;md=mode;val=bg
$set_mode sid=1;md=prs_osr;val=16
$set_mode sid=1;md=prs_mr;val=32
$start_sensor id=1
A set_mode command with correct parameters results in $ack and a bad one results in $nack
Stop the flood of sensor data with the $stop command
$stop
The flood of sensor data looks like this. The first number is the sensor id, the second is what's being produced (a=altitude, t=temp, p=pressure) based on the sinfo results. The last value is a timestamp.
$1,a,27.8411,282787
$1,t,35.0797,284036
$1,p,1009.9077,284036
$1,a,27.8638,284036
$1,t,35.0619,285286
$1,p,1009.9113,285286
Good luck hacking your infineon!
Sunday, May 28, 2017
Your Bluetooth is bad (and you should feel bad)
Alternative title: your Bluetooth is great, and you should feel great!
Little Bluetooth devices are awesome! What’s not to like about teeny little things with switches and lights, magnetic sensors and motors? And over the years, I’ve learned what makes a device easier or harder to control.But first, a quick TL/DR about Bluetooth for people who aren’t as familiar. Some devices are like a serial port: you send bytes, and you get bytes, and the device maker has to invent a little protocol for what the bytes mean.
Picture break: some of the Bluetooth devices mentioned
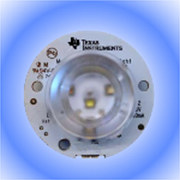
Left to right: MetaWear, SensorTag, BERO robot, TI Lamp kit
Other devices are BLE devices: each device has a set of “services”; each service has a set of “characteristics” with a name and value which can often be read, written, or can send a notification on change. There are a bunch of standard services and characteristics. For example, service 180f is the battery service; it includes characteristic 0x2a19, battery level which is a single byte with a value 0 to 100.
Extra-wordy documentation!
I’m looking at you, otherwise awesome BBC micro:bit. Here’s a short snippet from one characteristic:Read MandatoryThat’s a big table with lots of rows, and it could all have been replaced with a single entry: “Supported operations: Read”.
Write Excluded
Write Without Response Excluded
Signed Write Excluded
Reliable Write Excluded
Indicate Excluded
Broadcast Excluded
Writeable Auxiliaries Excluded
Extended Properties Excluded
Sloppy details!
Service 0x180a, device information, includes characteristic 0x2a29, Manufacturer name string. It should be something like a company name, right? Like “Texas Instruments” should be the manufacturer name on their delightful SensorTags. In reality, the most common manufacturer names I see is a blank string, and literally the words, “Manufacturer name”.Similarly, each characteristic can be named. TI is really good about adding clear names to their device characteristics; you can almost use just the names to guess how to control the device. The micro : bit, less so. I had to update my Network Explorer program to convert the BBC GUIDs into more readable names.
More bluetooth devices
Left to right: BBC micro: bit, DOTTI, Hexiwear, Magic Lamp
Slow commands!
The Dotti is an 8x8 pixel light where each pixel can be set to any color using a Bluetooth command. Too bad the write is a “write with response” which is extra-slow, so that actually filling up the screen is slow and painful instead of fast. The BBC micro : bit, in contrast, has a single command that can fill its entire 5x5 pixel display in a single faster command.Make the app do all the math!
The original 2541 SensorTag is a small device with a bunch of sensors – temperature, pressure, and more. TI decided that “raw” access to the data was more important than “simple” access. This is the temperature and pressure code that each app needs to write:t_a = ((c0 * t_r / Math.Pow(2, 8) + c1 * Math.Pow(2, 6))) / Math.Pow(2, 16);
S = c2 + c3 * t_r / Math.Pow(2, 17) + ((c4 * t_r / Math.Pow(2, 15)) * t_r) / Math.Pow(2, 19);
O = c5 * Math.Pow(2, 14) + c6 * t_r / Math.Pow(2, 3) + ((c7 * t_r / Math.Pow(2, 15)) * t_r) / Math.Pow(2, 4);
p_a = (S * p_r + O) / Math.Pow(2, 14);
p_a = p_a / 100.0;
The newest SensorTag, the 1350, has values that can just be read directly. Except that they are the only 3-byte results I’ve ever seen. Fun fact: there aren’t any helper libraries for reading in 3 byte values.
Ignore the math details!
Looking at you, Google Eddystone! One of the values that an Eddystone beacon can produce is the temperature of the beacon; it’s documented to be a floating number in “8.8” format.Specifically, here’s what the Eddystone spec says:
- Beacon temperature is the temperature in degrees Celsius sensed by the beacon and expressed in a signed 8.8 fixed-point notation. If not supported the value should be set to 0x8000, -128 °C.
(Weirdly, there’s a python library for the Ruuvi tag that says that the temperature data is in “8.8” format. But they decode it using the RuuviTag way, where the second byte just has a value 0..99, and where the first byte actually isn’t in two’s complement.)
And some more little devices
Left to right: another MetaWear device, NOTTI, the 1350 SensorTag, and the AutoBike with a Bluetooth shifter
Pretend it’s serial!
The Magic Light BLE is a pretty standard Bluetooth-enabled, color-changing bulb. It’s weirdness: that instead of having a simple characteristic for setting the color (like the TI beLight and pretty much all of the others!), they have a “serial protocol”. There is a single characteristic to write data to, and a single one to read from, and you have to send in a set of bytes using some other protocol that they just made up.For extra weirdness: they don’t think Bluetooth is reliable, so there’s a bizarre checksum on the command.
This is different from the puck.js device, where they do the same kind of thing, but it’s OK because the data you send is literally a stream of JavaScript commands (how cool is that?)
I also give a pass to my Autobike that has a computer-controlled continuously variable transmission with a stream of Bluetooth data. It’s an older device from before all the BLE stuff was more standardized. And I really like the bike.
And a word about my apps…
Some of my apps directly control devices: BERO Robots, Quirky Nimbus, Autobike, TI SensorTag 2541, Magic Light, TI BLE Lamp, MetaWear. And my do-it-all Network Inspector gives a more raw approach to investigating Bluetooth devices.And then there’s the Best Calculator, IOT edition. It is programmable in BASIC (!), and the BASIC has a bunch of extensions to make all kinds of IOT and Bluetooth programming easy. It’s got a free trial, and will save you time when you’re automating your life. Give it a try!